
Visual Studio Debugging Tip: Conditional Breakpoints
A conditional breakpoint is a breakpoint that will only be hit when a certain condition, defined on the breakpoint itself, is met. The ability to put a condition on a breakpoint is typically supported in most modern IDEs.
I was inspired to write this post after working with a less experienced developer that had never seen this done before. Creating conditional breakpoints can be extremely helpful and save a lot of time when debugging. A common use case for a conditional breakpoint is typically when debugging some kind of loop. Usually when the loop has to run a large number of iterations before it reaches the scenario that actually needs debugging.
The program used for this example uses the MySQL Sakila database. I’m also using Visual Studio 2026 for this example, but the steps are the same in earlier versions of Visual Studio.
For this example, I’m going to use the loop shown in the screenshot. The loop creates a connection to a MySQL database, gets the list of customers from the GetActiveCustomerData function, and then iterates through each customer to create a new Invoice object.
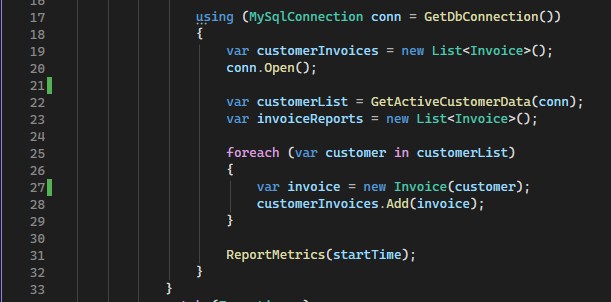
Example code with foreach loop
For the sake of example, let’s assume this code has a bug that only occurs for one customer, which is the customer where CustomerId = 410. There are 584 customers in the customerList object returned from GetActiveCustomerData.

Count of 584 in customerList
Without the ability to set a conditional breakpoint, a developer would have to either step through all 584 rows one at a time, or temporarily change the code so only the desired results are evaluated. The former would be prohibitively time-consuming, and the latter carries risks, such as unintentionally changing the behavior of the code. Fortunately, neither of those is necessary. We can set a conditional breakpoint instead.
The first step is to set the breakpoint where we want the execution to stop.
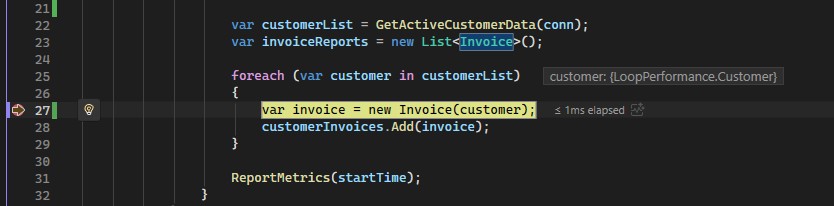
Initial breakpoint set on line 29
Once the initial breakpoint is set, I can right-click on the breakpoint itself and click “Conditions…” from the context menu.
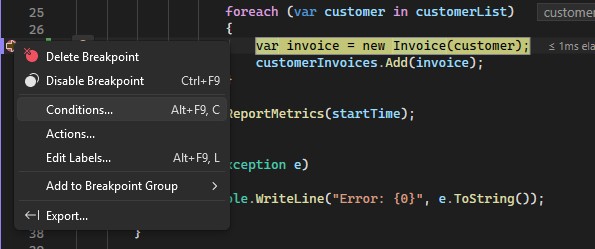
Conditions… item from context menu
Clicking “Conditions…” opens the Breakpoint Settings. The Conditions checkbox is checked by default.
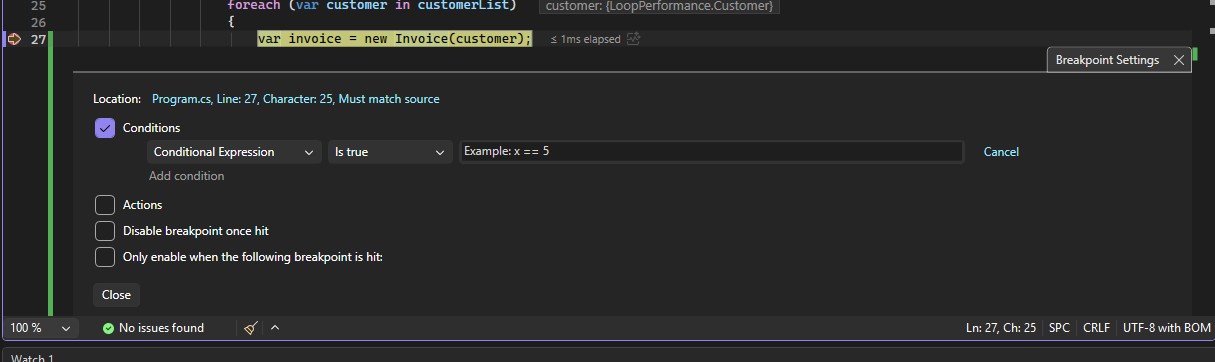
Breakpoint Settings
I can begin filling in the condition in the condition field. Visual Studio supports Intellisense in the condition in the condition field.
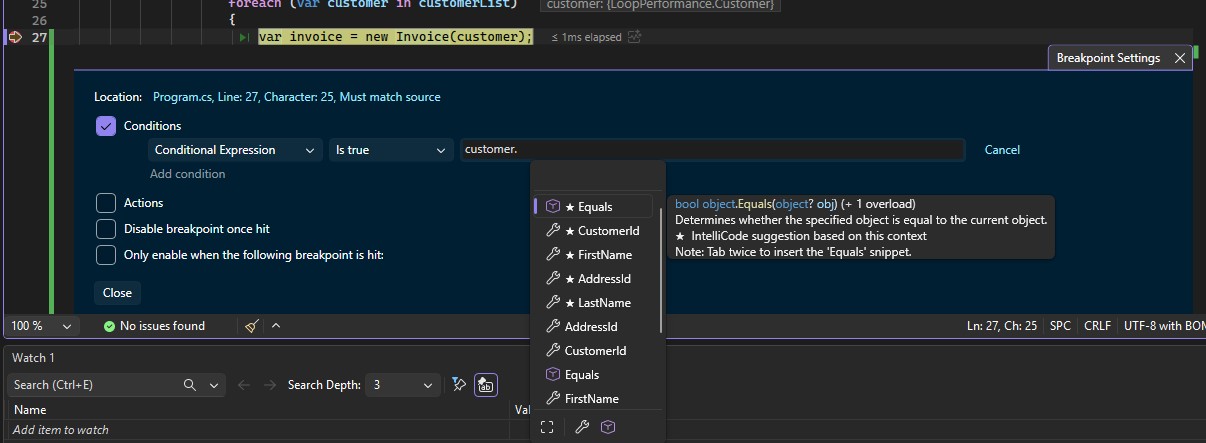
Intellisense active in the Condition field
I can complete the condition and press enter to activate that condition for the Breakpoint.
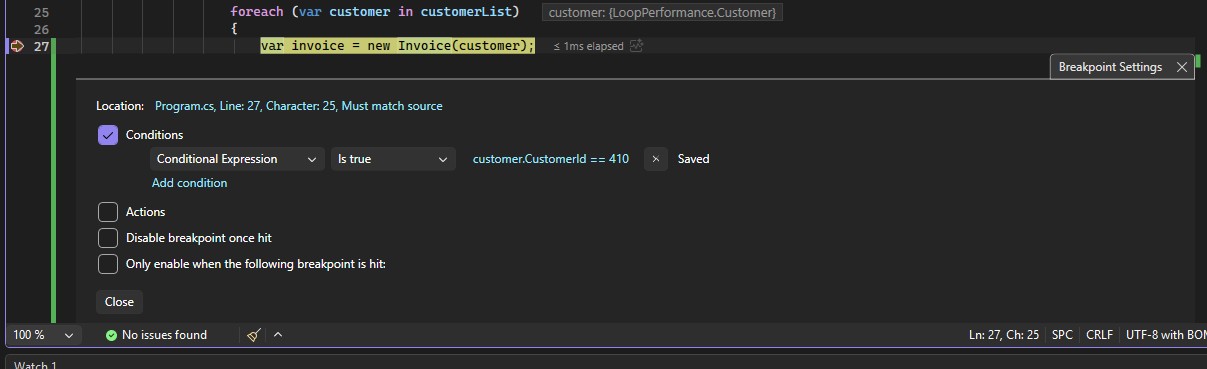
Condition ‘customer.CustomerId == 410’ activated
Now that the condition is activated, I can close the Breakpoint Settings. I’ve stepped to the next line of code. When a breakpoint has settings defined, the breakpoint icon will show a “+” symbol inside the breakpoint icon.
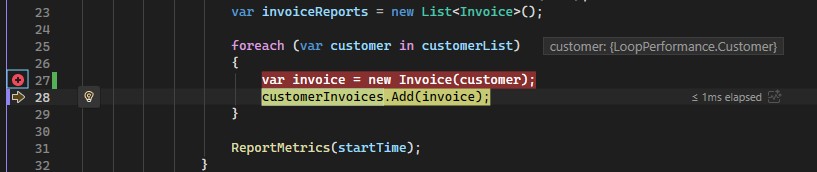
Breakpoint icon indicates condition set
I can now click the run button to let the execution continue through the loop. The execution stops when the breakpoint condition is met.
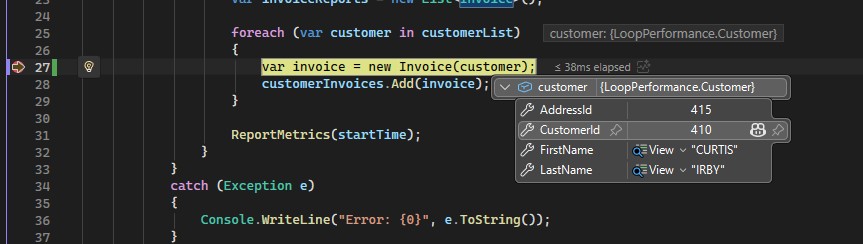
Breakpoint condition met, execution stopped
Conditional breakpoints are a great time-saving tool that can simplify complex debugging scenarios. The steps to set up a conditional breakpoint are very similar across many modern IDEs and languages. This example used C#, so C# syntax was used for the conditional breakpoint. If you are working in another language or another IDE, you will need to define the condition using the syntax of the target language. For VB.NET for example, the condition would be defined as customer.CustomerId = 410.